The Best Peanut Butter Milkshakes, Easy

Jump to Recipe

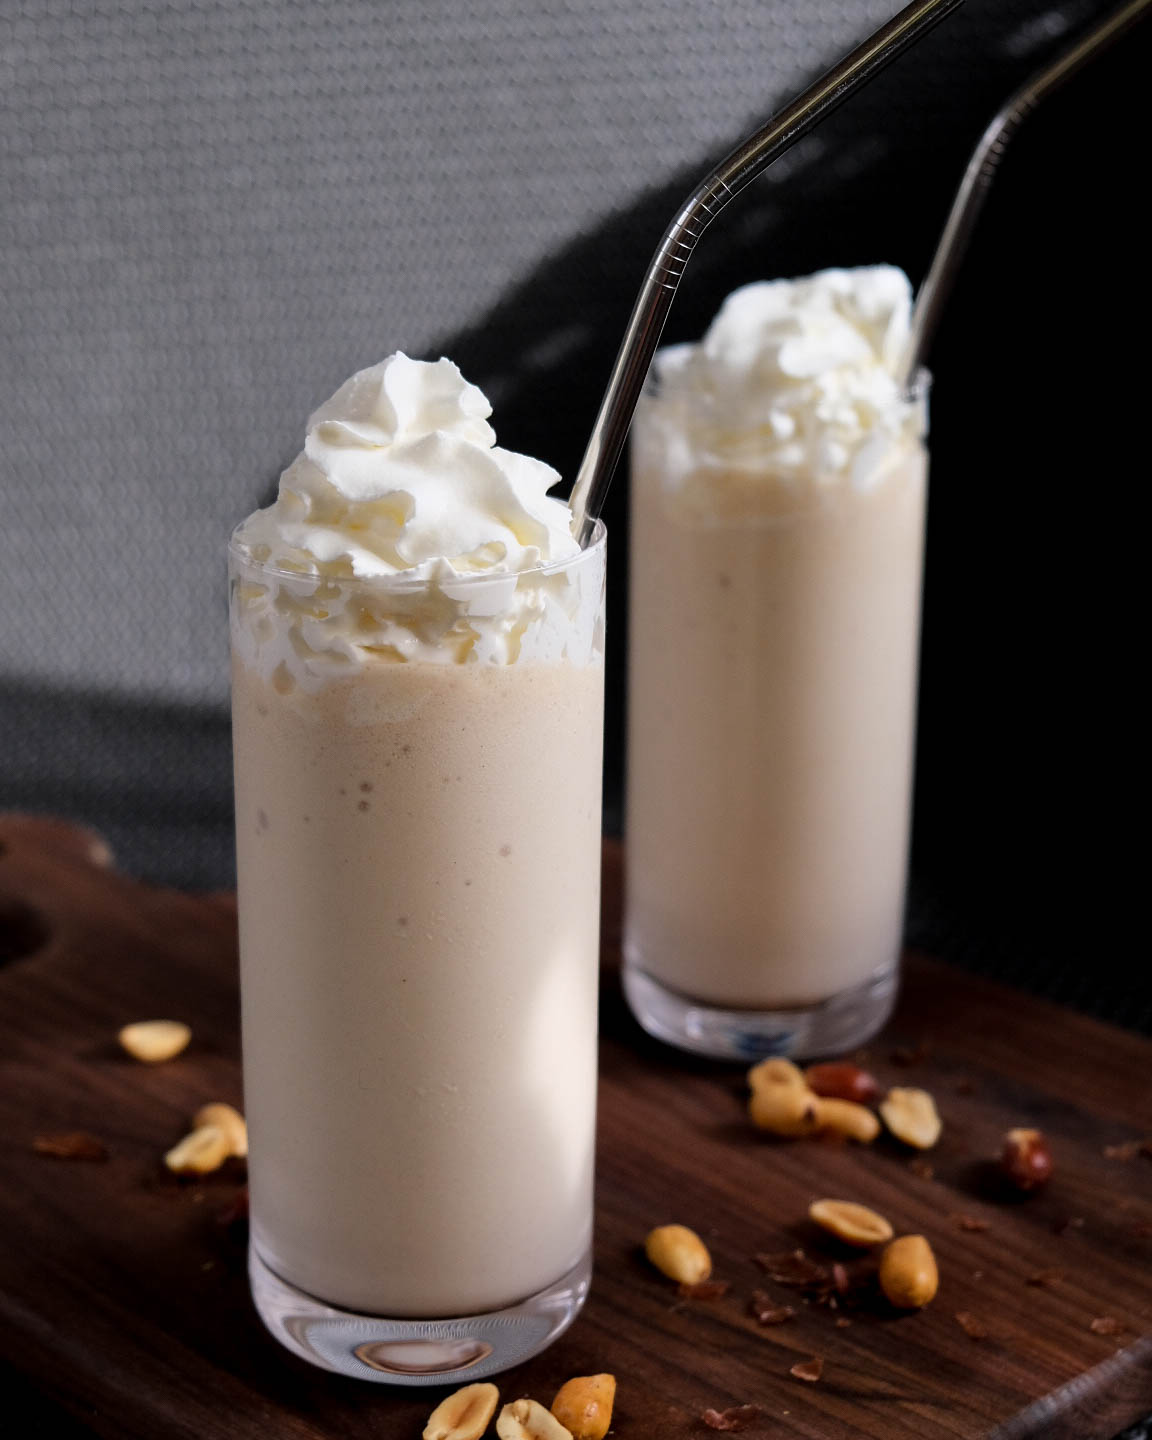
Peanut Butter Milkshakes are honestly my favorite after dinner snack to make. I am one of the biggest peanut butter lovers and this is so easy to make using only 3 ingredients.

So I remember making these milkshakes a lot for my dad and I when I was younger and living at home. Recently when he came to visit us here in Canada, I started talking about them and my dad told me a little story. So when he was younger, my grandma and grandpa would go on and on about how he made the best milkshakes around. So of course he loved hearing that and loved to make them for everyone. Turns out that was my grandparents sneaky way of getting out of making dessert. So I started wondering if my dad was doing the same with me! I still haven’t asked him but even if that’s the case, I still love doing it and I think they are pretty dang good.

Peanut Butter Milkshakes with whipped cream

The best thing is this Peanut Butter Milkshake only takes 3 ingredients to make, more if you like toppings. And I mean, has whipped cream ever made a dessert worse? If so, I can’t think of one! My second favorite thing is that you can add however much, or little peanut butter you like. I like A LOT, but my husband doesn’t like as much so sometimes I pour his, then add more to mine. You can also make it as thick/thin as you like. Just start by adding a little milk and add more as you go.

So all you need for this milkshake is vanilla ice cream, peanut butter and milk. And optional toppings, my favorite is whipped cream. I also like to leave the ice cream in the blender for about 5 minutes before I blend. This just makes the ice cream softer and easier to mix.

The Best Peanut Butter Milkshakes

Blaire
5 from 1 vote
Prep Time 5 minutes
Blending Time 2 minutes
Total Time 7 minutes
Course Dessert
Cuisine American
Servings 2 people

Equipment

  • Blender

Ingredients
  

  • 3 cups vanilla ice cream
  • 1 cup milk
  • 1/4 cup peanut butter creamy
  • topping whipped cream optional

Instructions
 

  • Add your ice cream to the blender and let sit for about 5 minutes to soften.
  • Add your milk and blend until smooth. Turn off blender.
  • Add your peanut butter and blend again until smooth.
  • Add to your glass and top with whipped cream and enjoy!

Notes

Start off by adding a little less milk it you like your milkshakes thick or add more if you like them a little thinner. 

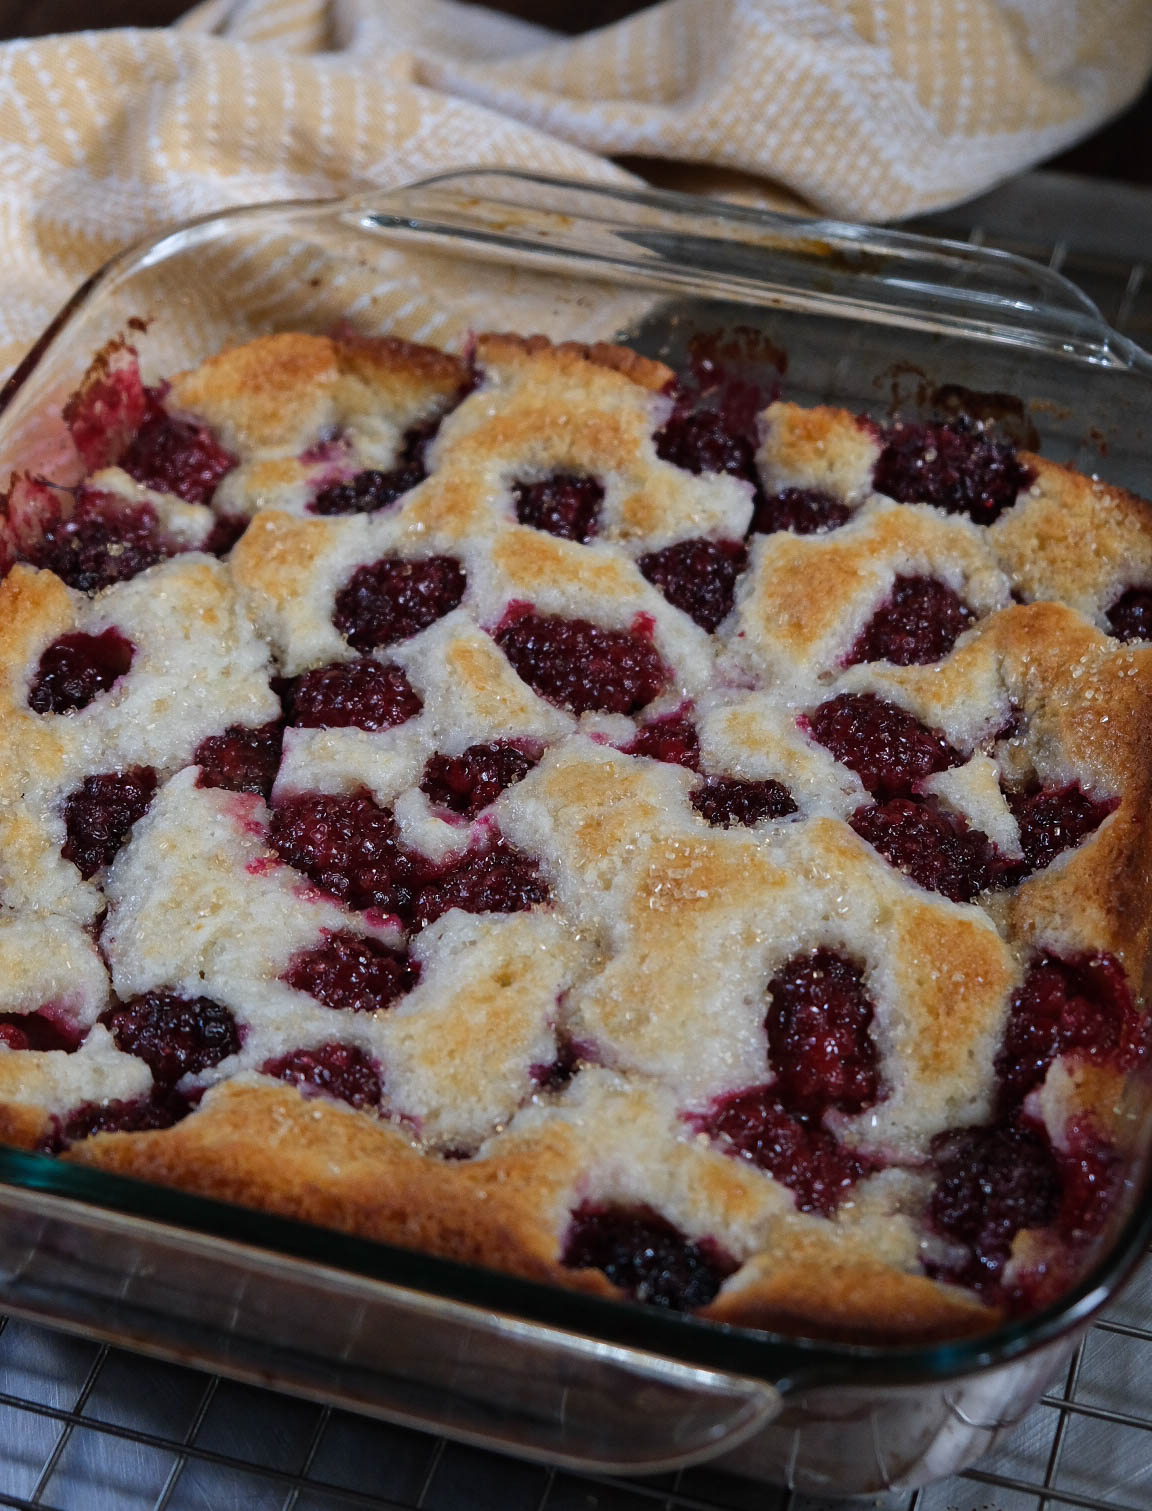
Don’t like peanut butter? Try my blackberry cobbler recipe!

The Best Blackberry Cobbler That’s So Easy

Jump to Recipe

This Blackberry Cobbler recipe comes from our old church cookbook, given by my lovely aunt Denise. Not only do I love making this recipe as an adult. It used to be my favorite thing to make when I was little.

My parents have always had a garden and were growing all kinds of fruits and vegetables. But my favorite things to pick were the blackberries. I would check the blackberry bushes every other day, and when I would bring back enough, my mom would make this recipe for me. She would 1/3 the recipe and I would make Blackberry Cobbler in my Easy-Bake Oven. It took forever, but it was so worth it!

The best way to melt the butter is to cut your stick into cubes and put it in the oven. While you are preheating the oven and preparing your other ingredients, pop your baking dish with the butter inside. Just make sure you check on the butter and don’t let it burn because we don’t want it browned.

Let the cobbler rest for a few minutes after coming out of the oven.

This cobbler comes out smelling so good you are going to want to dig right in. But let it cool and rest for a few minutes so it’s not too mushy and it holds its shape better.

While checking if the cobbler is done, you will know when a toothpick inserted comes out clean.

Top with a little raw sugar for a little extra nice look, and because the blackberries can be quite tart.

This Blackberry Cobbler is so delicious and easy to make. It is definitely not healthy but it’s one of my favorite comfort foods to make. Just top with a little raw sugar when it comes out (optional) because it looks so pretty.

The Best Blackberry Cobbler That’s So Easy

Blaire
Prep Time 5 minutes
Cook Time 40 minutes
10 minutes
Total Time 55 minutes
Course Dessert
Servings 9 people

Ingredients
  

  • 1 stick butter salted
  • 1 cup sugar
  • 1 cup flour
  • 1.5 teaspoons baking poder
  • 1/2 teaspoon salt
  • 3/4 cup milk whole preferred
  • 2 cups fresh blackberries
  • 1 teaspoon raw sugar (optional)

Instructions
 

  • Preheat your oven to 350°. Cut your stick of butter into cubes to melt easier, place in oven for a few minutes to melt. Keep an eye on it making sure not to burn.
  • Add your sugar, flour, baking powder, salt and milk to a bowl and stir. Don't over stir, a few small lumps are fine!
  • Pour into 9×9 baking dish that already has melted butte and give it a little stir. Add your blackberries to the top making sure to spread out evenly.
  • Bake for 40-50 minutes or until a toothpick inserted comes out clean (with no batter on it). Let rest for 5-10 minutes before cutting and top with a little raw sugar, enjoy!

This recipe can be used with any fruit you like, so if you don’t like blackberries, no problem!

Try one of my other recipes here: The Best Pig Pickin’ Cake

The Best Pig Pickin’ Cake with Coconut

There are so many recipes for Pig Pickin’ Cake on the internet, but this is the way my grandma used to make it so I hope you enjoy it. She always called it “Refreshing Cake” because she thought that perfectly described it. And if you have ever had this cake before I’m sure you would agree. With the pineapple, mandarin oranges and cool whip, this cake is very refreshing!

Something else I love about this cake is that the ingredients are easy to keep on hand. If you know you’re going to have to make a cake but you’re going to be busy, the ingredients can be bought ahead of time and keep well. The recipe is so easy and quick, besides the actual baking time, the only thing that takes a little more time is waiting for the cake to cool. Which can be sped up by putting the pan in the fridge on some trivets or a wire cooling rack.

I think this recipe is better when the cake has time to sit, so making it the day before you need it is a great option. If you don’t have time to make it day of, make it the day before and keep refrigerated.

The coconut flakes add a lovely texture but it’s totally optional

I prefer to use a hand mixer when I mix my batter because it helps break up the mandarin oranges. It’s also a little faster and let’s be honest, it’s more fun for the kids if they are helping! (Just make sure you are monitoring/helping the youngins if you are using a mixer!)

This is what your batter should look like before baking
Your beautiful Pig Pickin’ Cake with coconut

I like to use my 9X13 pan with a lid because as soon as your cake is ready, cut it and put the lid on, you’re good to go. Here is another 9X13 pan with a higher lid so the topping doesn’t stick to the lid.

You can eat this cake right after making it but I think it tastes better if it sits. Either for a few hours or overnight for best results. It gives the instant pudding mix time to dissolve/mix with the cool whip topping for a better texture and flavor.

The Best Pig Pickin’ Cake with Coconut

Blaire
Prep Time 15 minutes
Cook Time 30 minutes
Cooling Time 1 hour
Total Time 1 hour 45 minutes
Servings 15

Ingredients
  

For the Cake

  • 1 box White or yellow cake mix
  • 1 can Mandarin oranges in their juice do not drain
  • 3 Egg whites
  • 1/2 cup vegetable or canola oil

For the Topping

  • 1 16oz Cool Whip topping
  • 1 package Instant vanilla pudding mix
  • 1 can Crushed pineapple in juice do not drain
  • 1/2 cup Sweetened flaked coconut plus extra for topping

Instructions
 

For the Cake

  • Preheat oven to 350°. Mix cake ingredients together in a bowl with a hand mixer for a minute or two, scraping the sides with a silicone spatula to make sure everything is incorporated
  • Pour into a greased 9X13 baking pan. Bake for 20-25 minutes for until a toothpick inserted comes out clean. Let cool while you make the topping

For the Topping

  • Combine the topping ingredients in a bowl and stir with a spoon or silicone spatula. Top your cooled cake, spreading evenly and add coconut to the top. Enjoy!

Storage

  • Keep covered and in the refrigerator.

Notes

For best results, make sure your cake is fully cooled so it doesn’t melt your whipped topping.
Let sit for a few hours before eating if possible. This lets the instant pudding dissolve and tase even better!

Try my Puppy Chow Recipe for your looking for a dessert that is even quicker/easier to make!

The Best Puppy Chow with 5 Ingredients

Jump to Recipe

When I was growing up, Puppy Chow was one of my favorite snacks that my mom would make for us. Not only is it yummy but its very easy to make and she always let us help. This recipe is so great because we usually always have all the ingredients on hand, and you only need 5 things!

I know some people called these “Muddy Buddies” but where I am from we called it Puppy Chow. Which sometimes concerned people when we told them we would bring it to a potluck or as a snack.

Easy and made with only 5 ingredients

For this recipe you only need a few things, a small pot, a silicone spatula, and a large bowl with a lid. If you don’t have a bowl big enough with a lid that’s okay. The lid just makes it easier to mix at the end, plus its fun to let the kids shake up!

Puppy Chow

Puppy Chow

Blaire
Easy Puppy Chow with only 5 ingredients
5 from 1 vote
Prep Time 0 minutes
Cook Time 5 minutes
Total Time 5 minutes
Course Dessert
Cuisine American
Servings 10

Ingredients
  

  • 8 cups Crispix Cereal
  • 1.5 cups semi-sweet chocolate chips
  • 1 cups peanut butter creamy
  • 1-2 tablespoons vegetable oil or butter
  • 2.5 cups powdered sugar

Instructions
 

  • Measure out your cereal into an extra large mixing bowl
  • On low heat, melt your chocolate chips and oil/butter together, stirring continuously until smooth. Don't walk away from your chocolate because it can burn very quickly!
  • Once the chocolate has melted, turn off the heat and stir your peanut butter until combined.
  • Pour mixture over Crispix and stir gently with a silicone spatula until the cereal is evenly coated.
  • Add your powdered sugar and shake with a secure lid (if possible). If you do not have a lid, carefully shake until cereal is evenly coated with the powdered sugar. Enjoy!

This recipe not for you? Try my favorite Peanut Butter Oatmeal Cookies with Chocolate Chips, it’s a firehall favorite!

Please let me know if you try out any of my recipes and tag me on Instagram because I would love to see it!

The Best Peanut Butter Oatmeal Cookies with Chocolate Chips

One of my favorite things to bake is cookies, and I have to say these peanut butter oatmeal cookies are the best. I make them more often than any other cookies and I get so many compliments and people asking for the recipe.

This makes about three dozen cookies so if you aren’t making them for a crowd, you could half the recipe. I always end up making the full batch and sending them with my husband to the firehall. I also love to give them away because who doesn’t want homemade cookies! The last batch I made lasted until 9 am at the firehall, they were devoured, and they are so easy to make.

Scoop your dough evenly after refrigerating
Peanut Butter Oatmeal Cookies with chocolate chips

Ingredients

  • 1 1/2 cups all-purpose flour
  • 1 teaspoon baking soda
  • 1 teaspoon baking powder
  • 1 tsp salt
  • 1 cup or two sticks of butter (softened)
  • 1 cup granulated sugar
  • 1/2 cup packed brown sugar (I used dark but light is fine)
  • 2 large eggs room temperature (I let mine sit on the counter about 30 minutes before baking)
  • 1 cup peanut butter (we love the 100% peanuts peanut butter)
  • 2 teaspoons pure vanilla extract (you can use baking vanilla in a pinch)
  • 2 cups whole oats
  • 2 cups semi-sweet chocolate chips

Directions

  1. Preheat your oven to 350° or 325° if you have the option for convection
  2. Whisk your flour, baking soda, baking powder and salt in a medium sized bowl and set aside
  3. In a large bowl, beat your butter until smooth and creamy, then add your sugars and beat again until creamed (a minute or two). Add your eggs, peanut butter and vanilla and beat again until everything is combined. Make sure to scrape the sides of the bowl with a silicone spatula.
  4. Add about half of your dry ingredient mixture to your bowl and mix, then add the rest and mix until well combined. Add in the oats and chocolate chips and stir to incorporate.
  5. Cover with cling wrap and refrigerate for about 2 hours up to overnight, if you don’t have that kind of time just pop it in the freezer until you’re ready to make.
  6. Line your baking sheet/s with parchment paper or a silicon baking mat and scoop even balls of dough onto them and bake for 12-14 minutes. If your dough is a little too hard to scoop, let it sit out for 30 minutes to thaw. A scoop makes this job super easy!
  7. Remove cookies from the oven and let cool for a few minutes, then carefully transfer to a wire rack to cool completely.

Also try my favorite peanut butter cookies!

Simple and Delicious Peanut Butter Cookies

This is probably my favorite cookie recipe. It’s so simple but such a staple for anyone who loves peanut butter.

Now, I used to always make this recipe with shortening, which also makes amazing crumbly cookies. But lately I have been using butter in them and let me tell you, the flavor is so good! The dough from this recipe is also a little easier to work with, it holds together much better.

I used an ice cream scoop (size 40) for my peanut butter cookies.

Today was oddly warm and the pups were super happy about it! They were pretty sleepy while I was baking.

Enjoying some sun.

Ingredients

  • 3 cups flour
  • 1/2 tablespoon baking powder
  • 1/2 tablespoon baking soda
  • 1/2 teaspoon salt
  • 1 cup brown sugar
  • 1 cup white sugar
  • 1 cup (or two sticks) of butter softened/room temperature (or you can use vegetable shortening)
  • 2 eggs
  • 1 cup 100% peanut butter
  • 2 teaspoons pure vanilla extract

Directions

  1. Preheat your oven to 350°
  2. Add your flour, baking powder, baking soda and salt to a medium bowl and whisk until combined, set aside.
  3. In a large bowl, mix your butter, eggs, sugars, vanilla and peanut butter until it has a nice whipped consistency (about a minute or two).
  4. Slowly add your flour mixture into your wet ingredients, mixing until combined. Making sure to scrape the sides of your bowl with a rubber spatula so that everything is incorperated.
  5. Chill your dough for 1-2 hours (this is optional), then using an ice cream scoop, scoop the dough onto cookie sheet, lined with either parchment paper or with a silicone baking mat. Making sure your cookies are about the size of a golf ball.
  6. Next using a fork, press down your cookies, making kind of a hashtag pattern (shown above).
  7. Bake for 12-15 minutes, let cool a few minutes, then transfer to a cooling rack.

Notes

  • You can definitely use any peanut butter you like, I just find that some make the cookies even sweeter, which is totally fine!

Here is the hand mixer I have been using for 10+ years and still works amazing: Hand Mixer

The baking sheet and rack I use, it even comes with a silicone baking mat: Baking Sheet and Rack

Silicone baking mat: Silicone Baking Mat

Some rubber spatulas that are very handy: Rubber Spatulas

My favorite vanilla for baking: Pure Vanilla Extract

The camera we use: Fujifilm Camera Fujifilm Camera with Lens

The Best Banana Bread Recipe

Whenever we buy bananas and they start to go brown, I make this recipe. Or I peel and freeze them to make it in the future!

One of my go-to and most made recipes that is always a crowd pleaser. It’s so easy and quick to throw together and I always have the ingredients on hand. And it’s so easy to change it up to whatever you are craving, add walnuts, chocolate chips, or both!

This recipe make two loaves, so you can always freeze one and thaw later. My personal favorite way to eat it, is to pop it into the toaster to warm it up and put butter on it, so yummy!

You can just mix everything together in one bowl, but don’t over mix!
Here is where you can add you extras, or if you are doing it all the same, add it to the bowl before you pour into your pans
Walnuts (my favorite)
Chocolate chips
Rocky relaxing while mom is baking

Ingredients

  • 1 cup mashed bananas (about two regular sized bananas)
  • 1 1/2 cups sugar
  • 1/2 cup vegetable/canola oil (you could also use 1/2 cup or 1 stick of butter instead)
  • 2 eggs
  • 1 tablespoon apple cider vinegar
  • 1 cup of milk (minus 1 tablespoon, explained in directions)
  • 2 1/2 cups flour
  • 1 teaspoon baking powder
  • 1 teaspoon baking soda
  • 1 teaspoon salt
  • one teaspoon vanilla
  • 1/2 cup walnuts or chocolate chips (1/4 cup of each if you are making both)

Directions

  • Preheat your oven to 350°
  • Add 1 tablespoon of apple cider vinegar to a 1 cup measuring cup, then fill with milk and let sit while you add other ingredients to the bowl, it should sit for at least 5 minutes
  • Mix all of your ingredients except the nuts/chocolate chips together with a hand mixer, if you don’t have one you can use a whisk
  • Stir in your walnuts or chocolate chips and stir in gently (if you are doing both differently, just stir them in when they are poured into their pans)
  • Grease two loaf pans and pour mixture into both pans evenly
  • Bake at 350° for 45-50 minutes or until toothpick inserted comes out clean

Notes

  • This recipe makes two loaves
  • Mash bananas up well with a fork before mixing, if there are chunks of banana in your loaf, no worries!

The Hand mixer I have used for the last 10+ years: Hand Mixer

Similar bread pans: Bread Pans

My absolute favorite vanilla to use for baking: Pure Vanilla Extract

The camera we use: Fujifilm Camera Fujifilm Camera with Lens

The Best Lemon Square Recipe

One of my favorite scents is freshly squeezed citrus. It makes me think of spring, it’s fresh and it just makes me happy! Lemon bars made with freshly squeezed lemons with a flakey sweet crust, even better.

Lemon bars are one of the things I made a lot when I started to bake by myself. They were easy and we always had all of the ingredients on hand. I loved making these for friends because I would always hear them say “I don’t really like lemon” or something to that extent. But when they took a bite of my lemon bars, I could tell by the look on their face that I had changed their mind.

To this day, this recipe still brings me joy and remembering how many people love them. I want to share this recipe in hopes that they will be enjoyed even more.

Your crust might look dry/crumbly, that’s okay!
I judge my crust by the edges, they are a nice golden brown.
Fresh out of the oven.
My helper for today, Leni

Ingredients For the Crust

  • 1 cup or 2 sticks butter (I use salted at room temperature)
  • 2 cups flour
  • 1/2 cup powdered sugar (plus more for topping)

Ingredients For the Filling

  • 4 eggs
  • 2 cups sugar
  • 1/3 cup lemon juice (I use fresh but you can use bottled)
  • 1/4 cup flour
  • 1/2 teaspoon baking powder

Directions

  1. For the crust: Mix butter, flour, and powdered sugar together with a hand mixer, then use your hands to really incorporate the butter. Your mixture will look a little dry/crumbly and that’s totally fine!
  2. Press the mixture into a 13×9 inch baking dish, and bake at 350° for 25 minutes or until light brown.
  3. For the filling: Mix the eggs, sugar, lemon juice, flour and baking soda together and pour over the crust, return to the oven for an additional 25 minutes.
  4. Cool and cut into squares, sprinkle with powdered sugar and enjoy!

Notes

I like to loosen the edges of the bars a few minutes after they come out of the oven, it makes it easier later to remove them from the pan.

I like these baking dishes because they come with nice lids for food storage: Baking Dishes

This is the hand mixer I have used for the last 10+ years and its great: Hand Mixer

The camera we use: Fujifilm Camera Fujifilm Camera with Lens