Copycat Pangoa Bowl from Freshii, Easy

Jump to Recipe

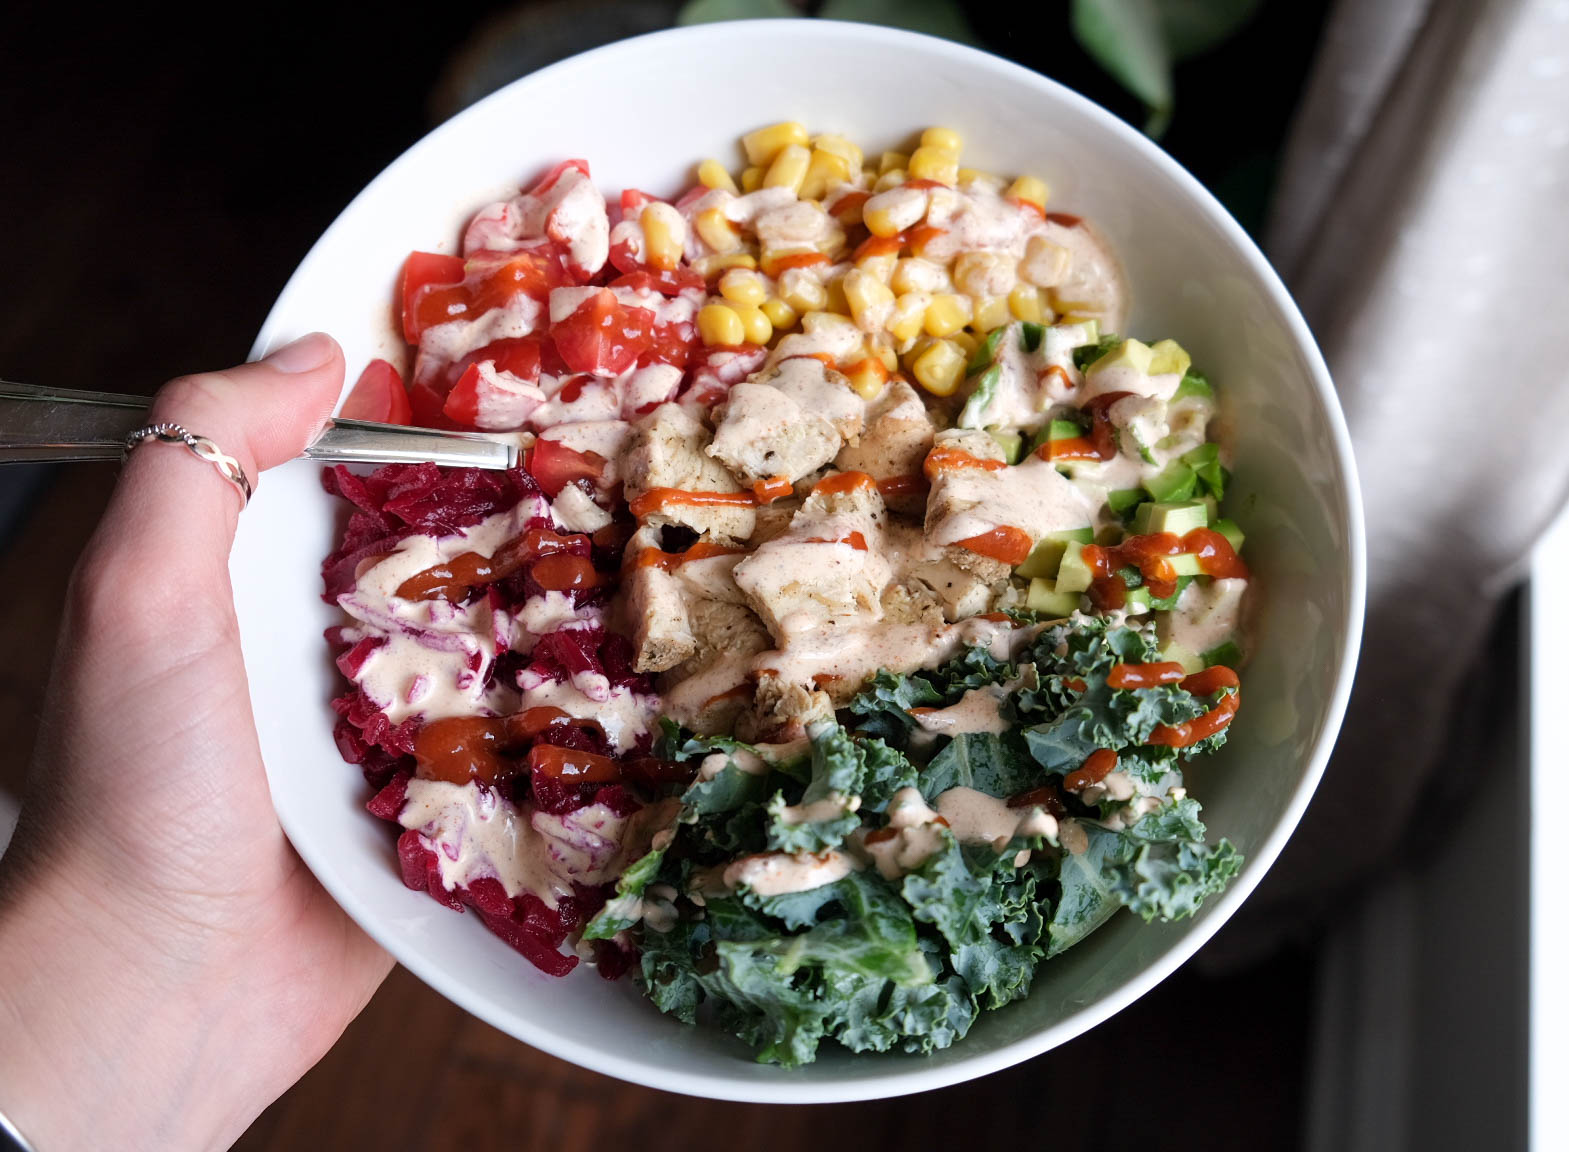
I love a good Pangoa Bowl from Freshii but I would much rather make it myself at home. Once I started making these at home they just don’t hit the spot when I buy one. You can add your proportions just as you like with the perfect amount of sauce, so good.

This is my second re-creation from Freshii, and my absolute favorite is the Oaxaca Bowl with Spicy Yogurt Sauce. Every time I make these my husband raves about them and says how much better they are. We also love how many veggies are in these and we feel so good about this meal! It’s healthy, delicious and easy to make into a vegetarian meal.

Pangoa Bowl from Freshii

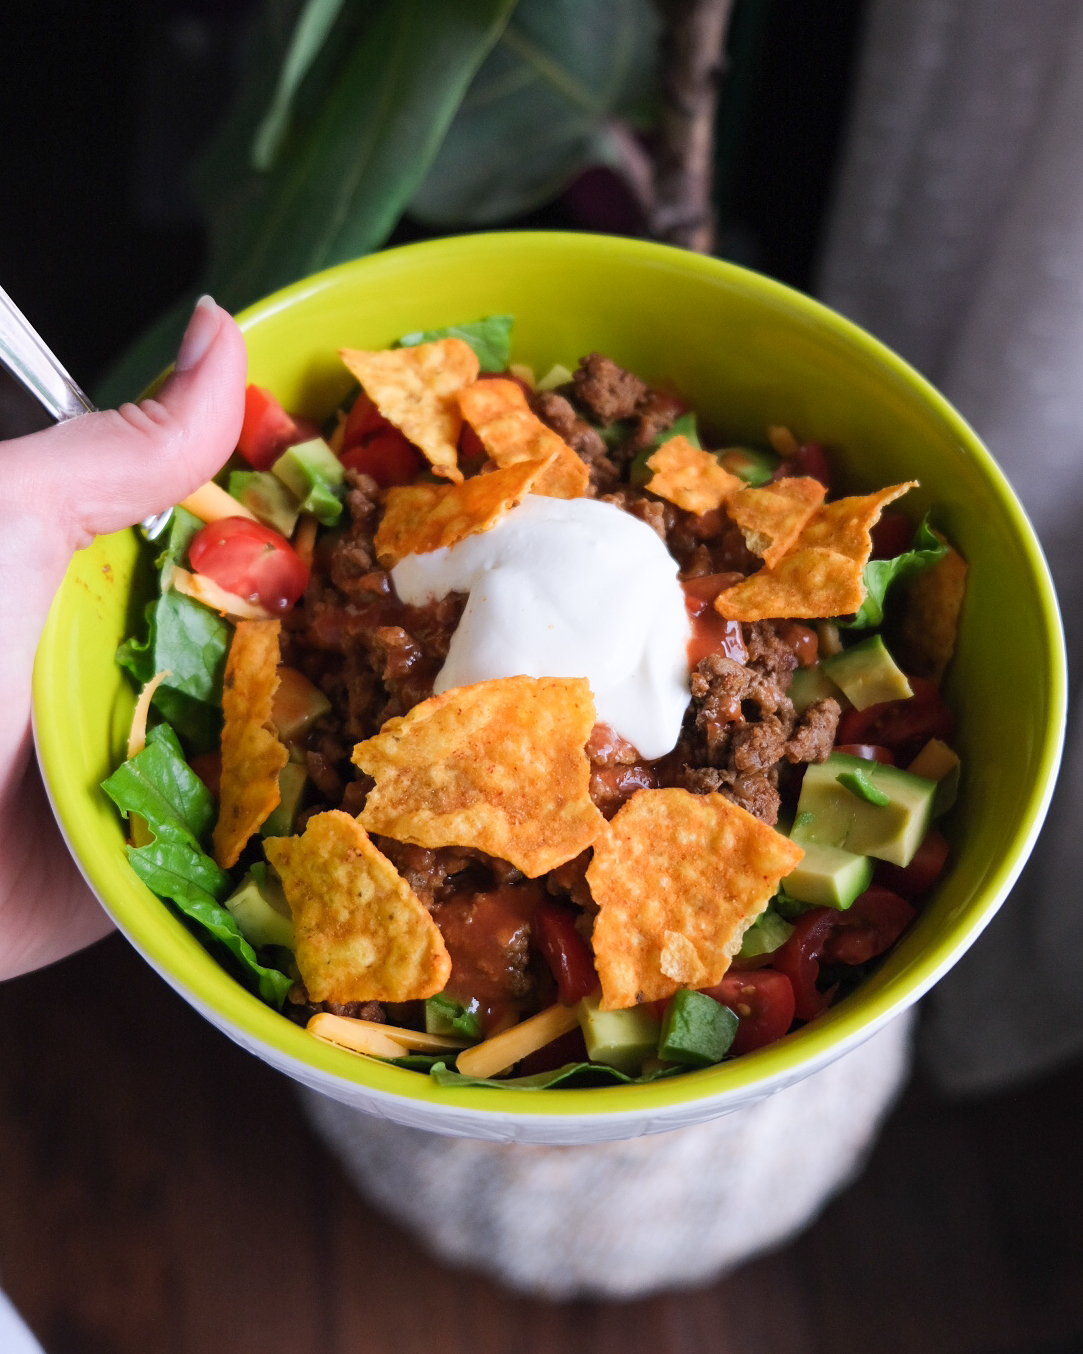
So like I said earlier, I like my bowls better because you can tweak them to your liking. The original recipe calls for brown rice and doesn’t come with chicken or tortilla strips. I have also tried it with a little kale and that wasn’t my favorite so I switched it to white rice and no kale. My husband likes the brown rice so it just depends on what you prefer.

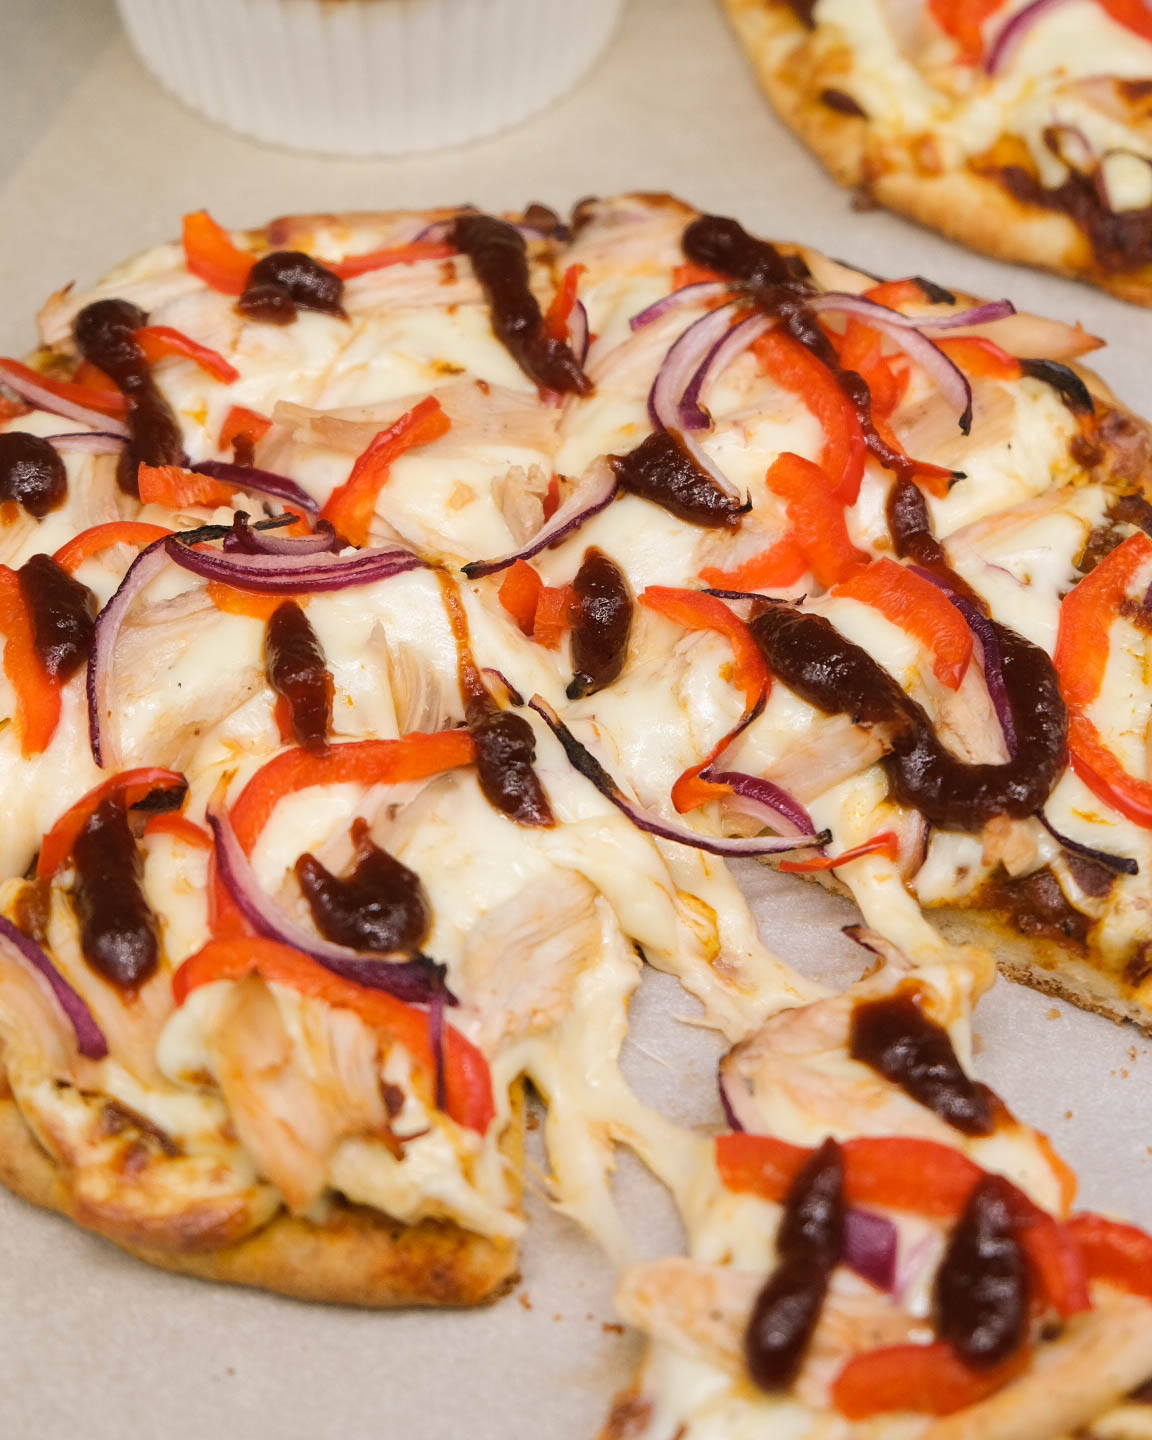
I say it all the time here on my blog but I love sauce! The more sauce the better in my opinion, and the spicy BBQ sauce in this bowl is amazing. I found the recipe for the BBQ sauce here. These bowls are not only good the first time, but they make great leftovers to take for lunch.

This recipe is very loosely made because with many of my recipes, I don’t measure what I put into the bowl. I just add in the proportions to my liking and so should you!

Copycat Pangoa Bowls from Freshii

Blaire B
5 from 1 vote
Prep Time 15 minutes
Cook Time 35 minutes
Total Time 50 minutes
Course Main Course
Servings 2 people

Ingredients
  

  • 2 cups cooked white rice use brown rice if you prefer
  • 2 chicken breasts cooked follow recipe below
  • 1 cup black beans drained and rinsed
  • 1/2 cup sharp white cheddar cheese shredded
  • 1/2 cup corn rinsed
  • 1/2 cup cherry tomatoes chopped
  • 1/4 cup fresh cilantro rinsed and chopped
  • 1/4 cup red onion finely chopped
  • 1 lime cut into wedges
  • 1/2 cup spicy BBQ sauce recipe linked below
  • 1/2 cup fritos optional

Instructions
 

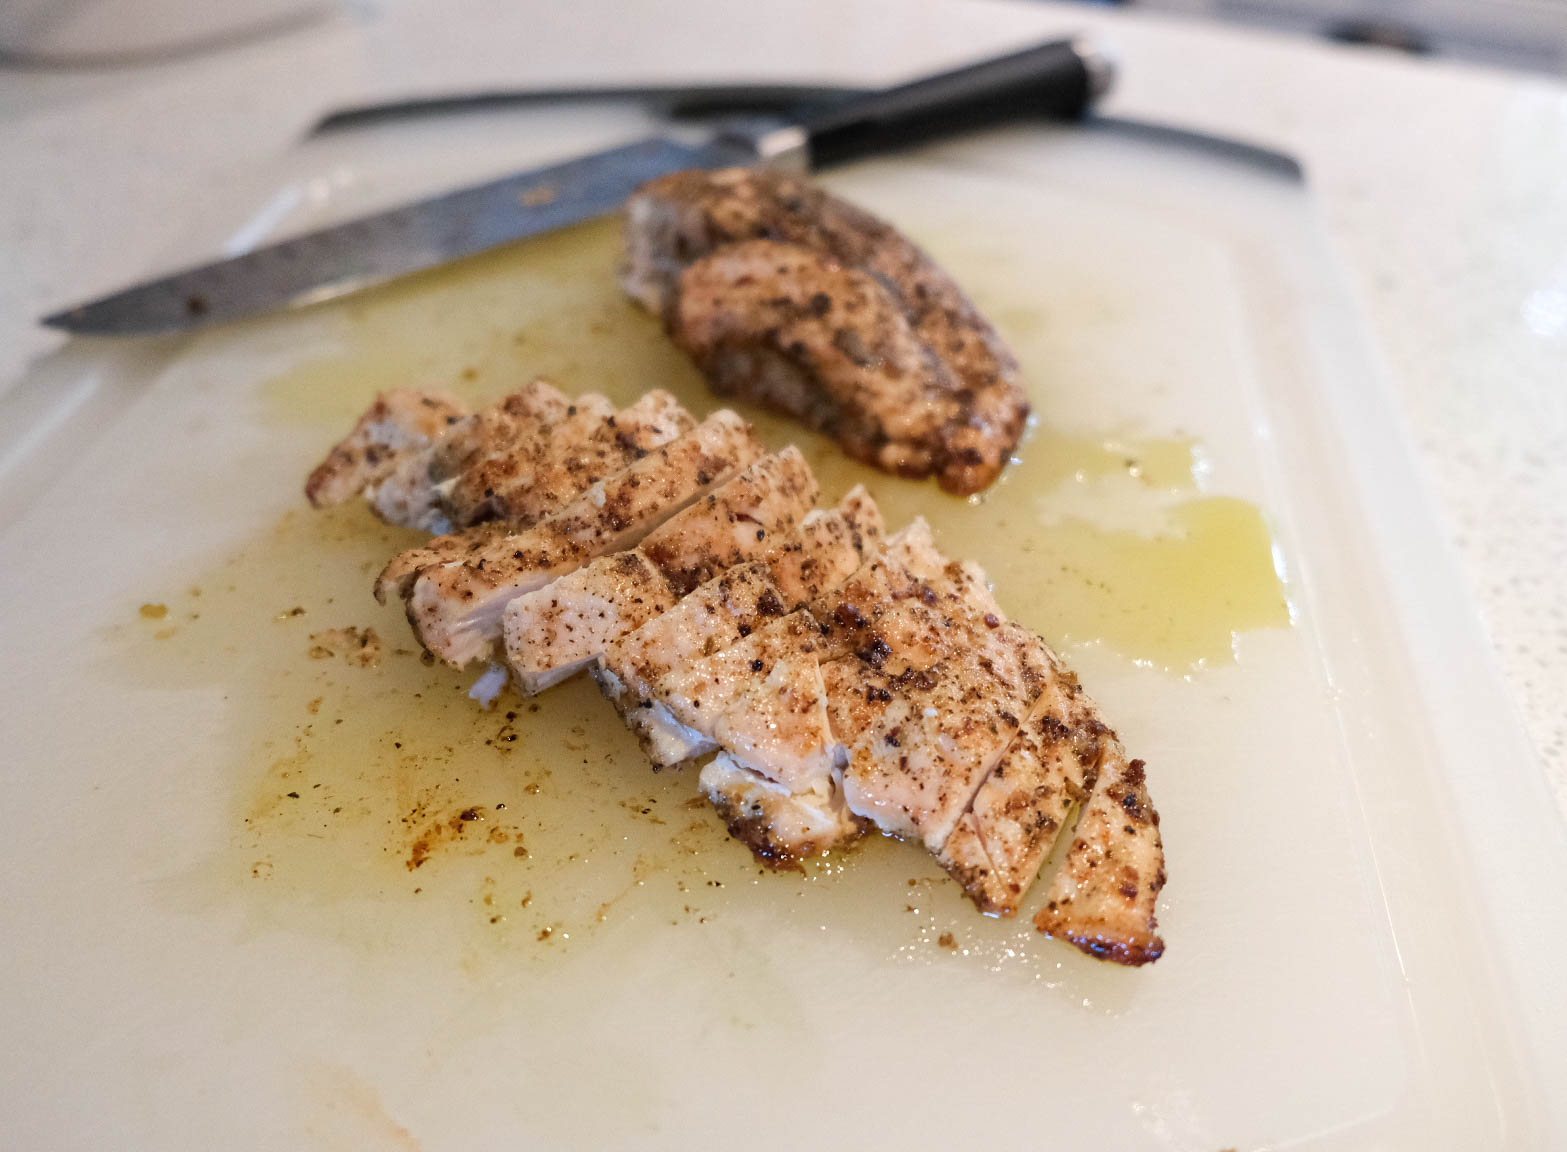
  • Cook rice as directed. Cook chicken as you like, I linked my recipe below.
  • Prepare all your other ingredients while rice and chicken are cooking.
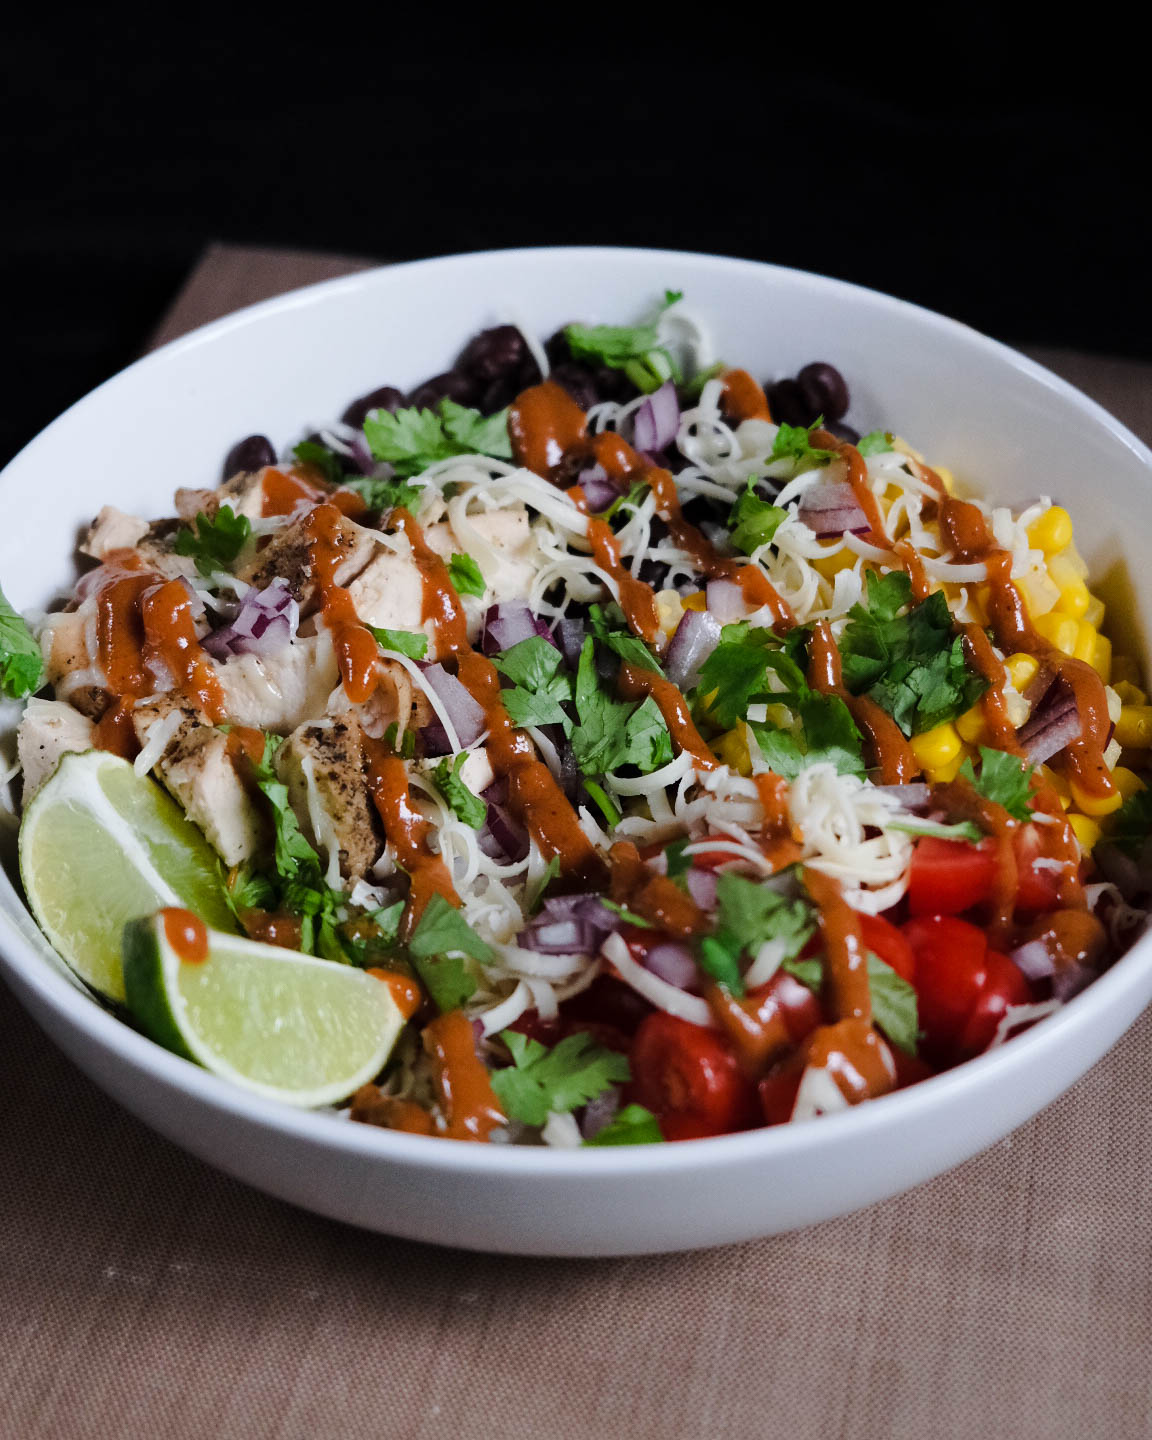
  • Add rice to your bowl first and then add all other ingredients to your liking, add Fritos, drizzle with spicy BBQ sauce and squeeze fresh lime juice over top. Finish and enjoy!

Here is the recipe I use when cooking my chicken breasts. Using basmati rice is my favorite for this recipe but use brown rice if you prefer.

Here is the recipe for the delicious spicy BBQ sauce.

Naan Pizza, My Favorite Easy Weeknight Dinner

Jump to Recipe

Naan Pizza is absolutely one of my favorite easy meals to make. This recipe actually came from one of the guys at the firehall that my husband brought home. We usually plan this for a meal when we are both going to have busy day, or just need a quick and delicious meal.

You can use whatever you like on your pizza, but our favorites are red onion, red pepper and shredded chicken. We have used leftovers from my chicken breasts recipe, and when we roast a whole chicken. To make this even easier, just grab a fully cooked rotisserie chicken from the store on your way home.

Top with your favorite veggies and BBQ Sauce

The secret to this Naan Pizza being so good is the Madras Curry Paste we mix with the pizza sauce. Our favorite one is by Patak’s, but if your store doesn’t have that brand, no worries. The curry paste has a nice little spiciness, and the flavor is just incredible.

You can always top your pizza after cooking with some extra sauce, or with some BBQ sauce. We love the Frank’s Buffalo BBQ, or you could try my homemade BBQ Sauce Recipe.

Naan Pizza with BBQ sauce for the weeknight win

Now I know I didn’t do a great job with the BBQ sauce for the photos. I should have put it in a squirt bottle and make it look nice and pretty but we aren’t perfect. And if i’m being completely honest, I was so hungry and could not wait to eat this so I rushed it. And that’s what life is sometimes, a bit rushed, but I did savor this Naan Pizza!

Naan Pizza

Prep Time 15 minutes
Cook Time 15 minutes
Total Time 30 minutes
Course Main Course
Servings 4 people

Equipment

  • 2 Baking Sheets
  • Parchment Paper

Ingredients
  

  • 4 pieces naan bread
  • 3 cups pizza mozzarella shredded
  • 1 cup pizza sauce
  • 2 tablespoons madras curry paste
  • 1 red bell pepper finely sliced
  • 1/4 red onion finely sliced
  • 1.5 cups shredded chicken pre cooked
  • BBQ sauce for topping

Instructions
 

  • Set your oven to 400°. Wash and slice all your veggies, shred your mozzarella cheese, and mix your pizza sauce with your curry paste.
  • Line your baking sheets with parchment paper and place your naan breads on top. Top like you would and other pizza with desired toppings.
  • Bake for 15 minutes or until desired look is reached. (I like mine with the cheese just starting to brown)
  • Remove carefully from oven, cut and top with BBQ sauce, enjoy!

Notes

I like my veggies to get a little cooked, but if you don’t I recommend putting a little extra cheese on top of your veggies so they don’t burn. This is what my husband usually does because he also likes to cook his a little longer.

If you try our any of my recipes and post them, please tag me because I would love to see them! Happy Cooking.

The Best Weeknight Taco Salad, Easy

Jump to Recipe

I started making this Taco Salad recipe about 8-10 years ago because I was missing the “Tacos in a Bag” I would get a high school football games. I love that its so quick and simple to make and you can add in whatever toppings you like.

Now I will argue that my recipe is a little more healthy, but the tacos in a bag are so fun and great for a crowd! It’s great for kids to be able to make their own and add what they like and be able to pick their favorite chips to go inside.

I love making this Taco Salad recipe the night before my husband’s shift, because I can have leftovers. This makes for great leftovers for lunch at work the next day or again for dinner.

Taco Salad for an easy weeknight dinner.

Easily turn this recipe to tacos in a bag, just by using snack size chips and adding in your ingredients. This would be great for any kids party, a sleepover, or and easy camping meal with less cleanup.

Don’t have snack size bags but still want the tacos in a bag? Try these paper snack bags that are recyclable!

I know I have been talking a lot about tacos in a bag than about Taco Salad. But the salad is definitely my favorite way to enjoy in on a weeknight. This recipe is just based off of the tacos in a bag because they were one of my favorite snacks. This way is just more dinner friendly because it’s more veggies and still delicious.

The Best Weeknight Taco Salad, Easy

Blaire
Prep Time 15 minutes
Cook Time 15 minutes
Total Time 30 minutes
Course Main Course
Cuisine American

Ingredients
  

  • 1 pound ground beef lean
  • 1 package taco seasoning
  • 1 head romaine lettuce rinsed and chopped
  • 1 cup cherry tomatoes rinsed and cut
  • 2 tablespoons red onion finely chopped
  • 1 cup old cheddar cheese shredded
  • sour cream for topping
  • hot sauce for topping
  • 1 bag Doritos or Fritos
  • 1 avocado finely chopped

Instructions
 

  • Brown your ground beef in a nonstick skillet, once cooked all the way through, drain off the fat
  • While your beef is coking, prepare your veggies by rinsing and chopping everything you would like to add
  • One beef is cooked and you have drained the fat, add in the seasoning packet and finish cooking according to the instructions.
  • Add everything to a bow, mix and enjoy!

Also try my Copycat Freshii Bowls for a healthy weeknight dinner.

If you try any of my recipes please let me know and tag me on Instagram because I would love to see it.

Pulled Pork Nachos that are Easy and Delicious

These Pulled Pork Nachos are one of our favorite meals to make with leftovers from my Pulled Pork Sandwiches in the crockpot.

There is a lovely restaurant we like to visit when we visit my parents in Ohio and I love their Pulled Pork Nachos, but we are only able to get them every so often. So I figured I would make them myself and let me tell you, I love this recipe even more! It’s so easy to throw together with leftovers. And if you are making the whole thing just for the nachos it’s really easy as well.

I definitely recommend using my homemade BBQ Sauce for this recipe because it’s easy and so yummy. But we also love the Frank’s BBQ Sauce to top them with.

The Best Pulled Pork Nachos
We added a lot of cilantro looking at these photos, but it was so good.

Ingredients

  • 1 bag your favorite tortilla chips
  • 12 oz block of sharp cheddar cheese
  • 1-2 cups of pulled pork depending on how meaty you like your nachos
  • pickled and fresh jalapeños sliced into rings- add to your liking
  • 1/4 cup finely chopped red onion
  • * 1-2 stalks chopped green onion
  • *1/2-1 avocado chopped
  • *1/2 cup cherry/grape tomatoes cut in 1/2 or 1/4 depending on your preference
  • *1/4 cup sour cream
  • *juice of 1 lime, about 1-2 tablespoons
  • *1/2 cup cilantro rinsed and chopped
  • *1/3 cup BBQ sauce for topping

* add after removing from the oven

Directions

  1. Preheat your oven to 375°
  2. Spread your tortilla chips on a baking sheet lined with aluminum foil, then top with cheese, pulled pork, jalapeños and red onion. Bake for 8-10 minutes.
  3. While those bake, add your lime juice to the sour cream and tiny whisk until combined. This just makes spreading the sour cream easier. We also put it into a squeeze bottle to make it even easier and you can store the extra for a couple days.
  4. Remove your nachos from the oven when finished and top wit the rest of your ingredients, enjoy!

Note: If you have read any of my other recipes I’m sure you know I’m not a fan of measuring my ingredients. It is different for everyone so add what you like and if it seems like too much/not enough for you, just adjust to fit your taste.

The Best Crockpot Pulled Pork Sandwich

One of my all-time favorite comfort foods is a pulled pork sandwich with coleslaw. Nothing is makes your day like coming home to the sweet smell of your dinner all ready to enjoy. This recipe is so easy and only takes a few minutes to prep, so its great to make before heading off to work!

The best pulled pork sandwich
Enjoy with some delicious homemade BBQ sauce

Enjoy with your favorite store bought or homemade BBQ sauce, we love this Frank’s BBQ Sauce in a pinch!

Top with coleslaw

Ingredients

  • 3.5-4 pound pork loin
  • 1 small yellow or white onion finely chopped
  • 2 cloves garlic minced
  • 1 cup vegetable broth
  • 1/4 cup apple cider vinegar
  • 1/4 cup brown sugar
  • 1 tablespoon Worcestershire
  • 1 teaspoon mustard powder
  • 1-2 cups of your favorite BBQ sauce
  • Burger buns

Directions

  1. Add all of your ingredients except for your BBQ sauce to your crockpot and stir, adding the pork loin in last.
  2. Turn your crockpot on low and cook for 6-7 hours, less time if you have a smaller piece of meat.
  3. Take your pork out when finished cooking and shred with two forks.
  4. Strain the liquid out of the crockpot and return the shredded pork and onions, adding your BBQ sauce. I say 1-2 cups depending on how much meat you have, and how saucy you like your pork.
  5. Enjoy on your favorite burger buns and top with coleslaw. I recommend trying my favorite homemade coleslaw recipe!

Copycat Freshii Bowls with Spicy Yogurt Sauce

I love eating out and trying new places, but when I find something I love, I want to figure out how to make it at home. This is one of our favorite dinners to make because you add what you like and it’s full of veggies. Freshii bowls can be a little expensive as well so it so much more cost effective to make them at home.

One of the main things I love about this bowl is the homemade spicy yogurt sauce. I have said it here before and if you know me, I love sauces! We love to store our extras in these squeeze bottles because they are so convenient.

Homemade spicy yogurt sauce
Finished Freshii Bowl

Ingredients

  • 1 cup of dried quinoa
  • 2 baked chicken breasts (find the recipe here) or use hard boiled eggs for protein if you don’t want chicken
  • 1/2 can sweet corn drained
  • 1/3 cup grated pickled beets
  • 1 cup diced cherry/grape tomatoes
  • 2 cups chopped fresh kale
  • 1 half of an avocado diced
  • 1/2 cup black beans, drained and rinsed (we sometimes mash ours and heat them up with a little salt)
  • Spicy yogurt sauce
  • hot sauce (we love Sriracha)
  • Corn chips to top (optional but adds a great crunch!)

Directions

  1. Bake your chicken how you like, this is our favorite way to bake our chicken.
  2. While your chicken bakes, cook your quinoa according to the directions on your package.
  3. While your quinoa cooks, rinse and chop your veggies.
  4. Add everything to your freshii bowls, we really don’t measure anything, we just add what looks good to our bowls and we definitely don’t use all the quinoa that this recipe makes.
  5. Once everything, except your corn chips, is in your bowl, give it a good stir and then add your corn chips last. You don’t have to do this but it just helps them from getting soggy.

Easy Chicken Breasts in the Oven

There are two things in my opinion that comes to cooking chicken breasts (or any chicken for that matter) that you don’t want to do. You don’t want to overcook it, and you don’t want to under season it. No one wants dry and bland chicken, and it is easy to over cook it in the oven.

I have noticed that several electronic food thermometers have presets for different meats, and some them are way past the safe temperature for chicken. The internal temperature for chicken breasts should be 165°. So here is an article from the Food Network if you would like to read more.

We eat a lot of chicken and we use this recipe a lot for several different meals. We put them in our Copycat Freshii Bowls with our Spicy Yogurt Sauce, our Chicken Bacon Salads with Homemade Ranch, and sometimes we just eat it as is with a little hot sauce!

Chicken breasts and ingredients

For this recipe you only need 5 ingredients: Salt, pepper, olive oil ,chicken of course, and your favorite no salt seasoning. We get ours from Costco because it is very well used. You can also find it here on Amazon!

Let chicken breasts rest for 5 minutes before cutting

Ingredients

  • 2 boneless skinless chicken breasts
  • 2 tablespoons extra virgin olive oil
  • salt and pepper (about small pinch of each for each side of chicken)
  • about 1/4-1/2 teaspoon of no salt seasoning per chicken breast

Directions

  1. Preheat your oven to 350°.
  2. Coat all sides of your chicken breasts with the ingredients, and honestly I really don’t measure mine because we make it so often, I just sprinkle some on to coat the chicken.
  3. Bake at 350° for 25-30 minutes or until your meat thermometer measures 165°.
  4. Remove from oven and let rest on a cutting board for about 5 minutes before cutting because you want to let it rest. Enjoy!

The Best Shrimp Tacos for a Quick Weeknight Meal

Tacos are a staple in this house and these are seriously the best and easiest tacos we make. It just takes a little prep for what ever toppings you want and to mix the seasonings. If you know me you know I have a little bit of an obsession with hot sauce. Because these shrimp tacos go perfectly with our favorite homemade hot sauce, we tend to make them more often.

My favorite thing about these tacos, besides how good they are, is that they come together so quick. If we know it’s going to be a long day or a late dinner, a lot of times this is our go-to meal.

Don’t overcook your shrimp or it will get chewy
All of our topping ready to assemble our tacos!
So messy, but so good
Our favorite shrimp tacos

Ingredients

  • 1-2 tbs seasoning (recipe in directions)
  • 1 lb shrimp, uncooked, peeled, and deveined
  • 6 flour tortillas, we love the Don Pancho street taco tortillas
  • Optional toppings that we love: avocado, shredded romaine lettuce, diced cherry tomatoes, sour cream, fresh lime juice, hot sauce and cilantro

Directions

  1. Cut and or dice all of you toppings first because the shrimp cooks quick.
  2. For the seasoning, we mix it in big batches because we make this pretty often. We just mix equal parts ground cumin, garlic powder, paprika, chili powder, oregano and kosher salt. We mix about 1-2 tablespoons of each spice together and save the rest in an empty spice container.
  3. Coat your shrimp with seasoning on each side and fry in a non-stick pan until cooked, making sure to flip halfway through, then set on a plate to the side.
  4. Warm your tortillas in the same pan as you cooked your shrimp (maybe 15-20 seconds a side on high heat)
  5. Assemble your tacos and enjoy!

Tips: We love to make a crema because it’s easier to drizzle. Mix 1/3 cup sour cream (or plain greek yogurt), the juice from about 1 lime and 1/4-1/2 teaspoon of ground coriander).

Below is a link to our favorite homemade hot sauce.

Easy Mongolian Beef Recipe with Rice

April is almost here and it is snowing again here in Canada so we were craving some comfort food. An easy Mongolian Beef recipe with steamed rice sounded perfect. This recipe only takes about 30 minutes including prep so it’s great for a weeknight meal.

Because Mongolian beef is not typically spicy, you don’t have to add the red pepper flakes. It depends on preference, but either way, you can’t go wrong!

Easy Mongolian beef recipe with rice

Ingredients

  • 1 Pound of stewing beef or flank steak cut into bite sized pieces (about 1-1.5 inch cubes)
  • 1 Tablespoon fresh ginger, grated with a Cheese Grater
  • 3 cloves of garlic pressed with a Garlic Press
  • 1/2 Teaspoon of red pepper flakes (optional)
  • 3 stalks of green onion chopped into 1/4-1/2 inch pieces
  • 1/3 Cup of low sodium soy sauce
  • 1/4-1/3 Cup of brown sugar (depending on how sweet you like yours, I used 1/4 cup)
  • 1/3 Cup of water
  • 1/4 Cup corn starch
  • 4-5 Tablespoons of Canola or Vegetable oil
  • Sesame seeds for topping
  • Steamed rice for serving

Directions

  1. Heat 1 Tablespoon of canola oil in a deep pan over medium-low heat, add your garlic and ginger and cook until fragrant (30-60 seconds). Watch carefully and don’t burn your garlic.
  2. Add your soy sauce, water, brown sugar and red pepper flakes to a bowl or Glass Measuring Cup and Whisk to combine. Add to pan and simmer on low for 10-12 minutes making sure not to burn. (Remove from heat if finished before beef)
  3. While your sauce reduces, coat the beef with the cornstarch, using less if needed, just make sure to coat evenly.
  4. Heat about 4 tablespoons of canola oil in a large pan on medium/ medium-high heat and add your beef. Let cook for about 3 minutes per side. (This splatters quite a bit so a mesh Splatter Screen is super helpful)
  5. Add your beef (drained of excess oil) and green onions to your sauce mixture and toss together.
  6. Serve over steamed rice and top with more green onion and sesame seeds if desired.

This recipe has been adapted from the site linked below.

Easy and Spicy Sloppy Joes in the Crockpot

For me, it doesn’t get much better than a nice meal made in the crockpot. Coming home from work or running weekend errands while dinner is cooking? Yes please! This recipe does require a little prep before tossing everything in and walking away, but it’s worth it.

It has been pretty cool and rainy out the last few days and I was really craving a nice crockpot meal. This is one of my go-to crockpot meals for autumn and winter, but they are great to have year round.

We did end up getting a little sun in the afternoon today and Rocky was really enjoying it!

I love my spicy foods, and this is a great recipe to experiment and add different kinds of spices. An absolute must though, is the celery seed! I can’t tell you how many dishes that I use celery seed in and it just makes it that much better.

Ingredients

  • 2 pounds ground beef
  • 1 yellow onion finely chopped
  • 3 cloves garlic minced
  • 1 green bell pepper finely chopped
  • 1 jalapeño seeds removed and diced
  • 1 6oz can vegetable juice, I used V8
  • 1/2 cup ketchup
  • 1 tablespoon yellow mustard
  • 1 tablespoon Worcestershire
  • 1 tablespoon Tabasco (or any other hot sauce of your liking)
  • 1/2 tablespoon horseradish
  • 1/2 tablespoon chili powder
  • 2 tablespoons brown sugar
  • 1 tablespoon celery seed
  • 1/2 teaspoon pepper
  • 6-8 burger buns

Directions

  1. Cook your ground beef in a large pan until its about halfway cooked, then add in your onion, garlic, bell pepper, and jalapeño and cook until ground beef is fully cooked, and your onions and peppers are softened.
  2. Drain the fat off of your ground beef and place in the crockpot.
  3. Add the rest of your ingredients into a bowl or large measuring cup and whisk to incorperate. Then pour over your ground beef mixture,
  4. Cook in the crockpot on low (recommended) for 8-10 hours, or on high for 3-4 hours and enjoy!

Notes: Everything is fully cooked so you can eat it whenever you like, I personally think that the longer it sits the better! So next day leftovers are always my favorite.

Amazon has a lot of great options for crockpots so here are some of my favorites: Crockpot 1 Crockpot 2 Crockpot 3 Crockpot 4

The camera we use: Fujifilm Camera Fujifilm Camera with Lens