The Best Blackberry Cobbler That’s So Easy

Jump to Recipe

This Blackberry Cobbler recipe comes from our old church cookbook, given by my lovely aunt Denise. Not only do I love making this recipe as an adult. It used to be my favorite thing to make when I was little.

My parents have always had a garden and were growing all kinds of fruits and vegetables. But my favorite things to pick were the blackberries. I would check the blackberry bushes every other day, and when I would bring back enough, my mom would make this recipe for me. She would 1/3 the recipe and I would make Blackberry Cobbler in my Easy-Bake Oven. It took forever, but it was so worth it!

The best way to melt the butter is to cut your stick into cubes and put it in the oven. While you are preheating the oven and preparing your other ingredients, pop your baking dish with the butter inside. Just make sure you check on the butter and don’t let it burn because we don’t want it browned.

Let the cobbler rest for a few minutes after coming out of the oven.

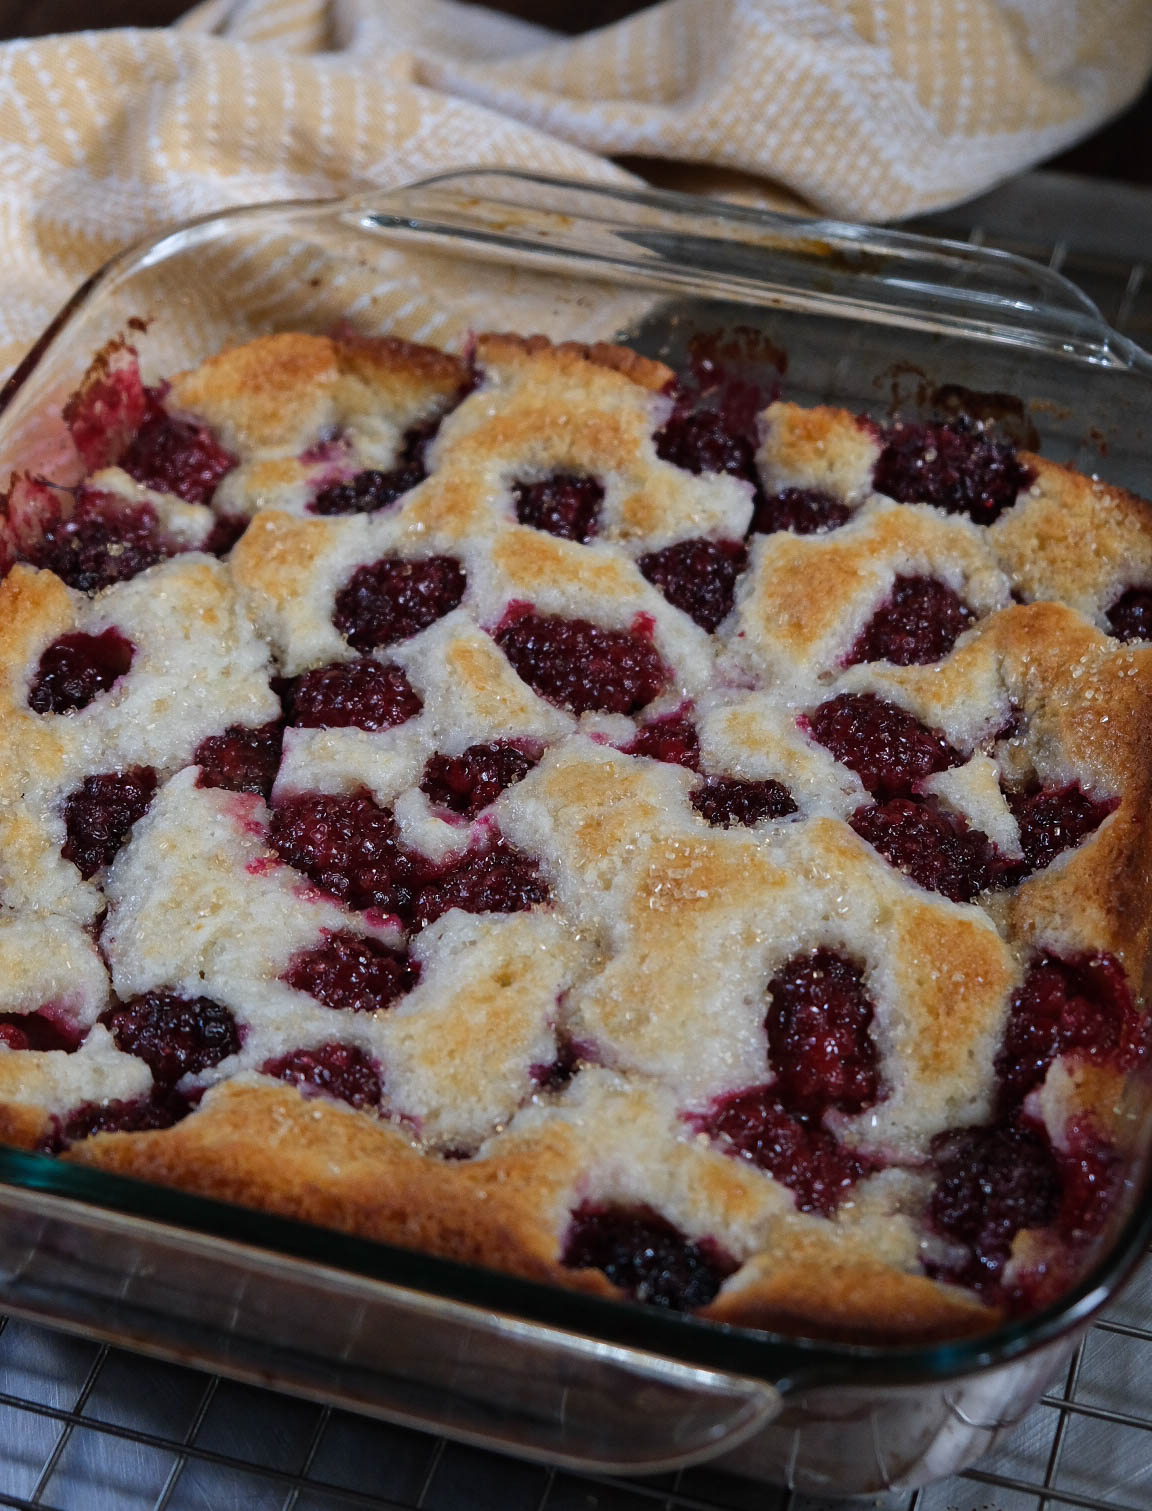
This cobbler comes out smelling so good you are going to want to dig right in. But let it cool and rest for a few minutes so it’s not too mushy and it holds its shape better.

While checking if the cobbler is done, you will know when a toothpick inserted comes out clean.

Top with a little raw sugar for a little extra nice look, and because the blackberries can be quite tart.

This Blackberry Cobbler is so delicious and easy to make. It is definitely not healthy but it’s one of my favorite comfort foods to make. Just top with a little raw sugar when it comes out (optional) because it looks so pretty.

The Best Blackberry Cobbler That’s So Easy

Blaire
Prep Time 5 minutes
Cook Time 40 minutes
10 minutes
Total Time 55 minutes
Course Dessert
Servings 9 people

Ingredients
  

  • 1 stick butter salted
  • 1 cup sugar
  • 1 cup flour
  • 1.5 teaspoons baking poder
  • 1/2 teaspoon salt
  • 3/4 cup milk whole preferred
  • 2 cups fresh blackberries
  • 1 teaspoon raw sugar (optional)

Instructions
 

  • Preheat your oven to 350°. Cut your stick of butter into cubes to melt easier, place in oven for a few minutes to melt. Keep an eye on it making sure not to burn.
  • Add your sugar, flour, baking powder, salt and milk to a bowl and stir. Don't over stir, a few small lumps are fine!
  • Pour into 9×9 baking dish that already has melted butte and give it a little stir. Add your blackberries to the top making sure to spread out evenly.
  • Bake for 40-50 minutes or until a toothpick inserted comes out clean (with no batter on it). Let rest for 5-10 minutes before cutting and top with a little raw sugar, enjoy!

This recipe can be used with any fruit you like, so if you don’t like blackberries, no problem!

Try one of my other recipes here: The Best Pig Pickin’ Cake

The Best Healthy Green Smoothie, Easy

This Green Smoothie is one of my go-to smoothies for breakfast or a healthy snack. If I’m not making my favorite blueberry peanut butter smoothie, I’m definitely making this one.

I used to have such a hard time making smoothies when I was younger and now that I have finally gotten the hang of it, it’s one of my favorite things for breakfast. It takes a bit of trial and error to keep these guys green too.

The Best Green Smoothie

Something I love about smoothies is that they are so easy and quick, with very little clean up. So these are amazing to take with you on your way to work, or to send with your kids to school. And it’s a prefect way to get some extra veggies in because you don’t taste the kale/spinach.

I absolutely love these glasses I got from Homesense, but there are some similar (and VERY trendy) ones here: ripple glasses.

Ingredients

  • 1 banana chopped, frozen or fresh
  • 1 cup yellow fruit, I used mango and peaches for this one
  • 1 cup packed spinach or kale rinsed
  • 1 cup almond or oat milk
  • 1/2 cup full fat greek yogurt
  • 1 tablespoon chia seeds
  • 1 tablespoon hemp hearts
  • 1/2 tablespoon maple syrup for sweetness if needed

Directions

  1. Add all of your ingredients to a blender and blend until smooth, I usually let mine go for a couple of minutes on high.
  2. Pour into your favorite glass and enjoy!

Tip: If your smoothie seems too thick just add a little more almond/oat milk to thin it out. Also, if you use any fruit that is red or blue/purple, your smoothie will still taste good, it just won’t be green anymore.

If you try any of my recipes, please take a photo and tag me on Instagram because I would love to see them!

The Best Overnight Oats

This is one of my favorite things to make when I know I am going to have a busy morning the next day. I keep my overnight oats in mason jars so they are quick to grab and go, and if you’re not in a rush, just easy storage.

We all have busy mornings, sometimes more than others, so why not make things a little easier. I like to store these in smaller jars with space in the top for fruit.

Add your oat or almond milk last
Your mixture should look like this
Place your jar in the fridge over night
Overnight oats with fruit
Overnight Oats

Ingredients

  • 2 cups whole oats (I use the quick oats)
  • 1 cup vanilla yogurt (We love the Oikos 25% less sugar)
  • 1/2 cup shredded coconut
  • 2 tablespoons chia seeds
  • 2 tablespoons maple syrup for sweetness (optional)
  • 2 cups unsweetened almond or oat milk
  • 1 splash pure vanilla extract
  • Fresh fruit for topping

Directions

  1. Stir all of your ingredients together in a bowl until combined.
  2. Pour into mason jars, I like to use a canning funnel because it makes things easier.
  3. Refrigerate overnight (as least 10 hours) and enjoy your oats in the morning with some fresh fruit.

Tips: This keeps pretty well in the refrigerator for 3-4 days. If you are taking them on the go, leave some empty space in the top if you want to add some fresh fruit.

Craving something different for breakfast? Try some of my other recipes below!

Breakfast Tacos

French Toast with Black Sesame Paste

Breakfast Smoothie

Please follow and tag me on Instagram if you try this recipe, I would love to see it!

The Best Breakfast Tacos with Homemade Hot Sauce

Breakfast is one of my favorite meals to cook. I love getting up on the weekends and having coffee, and a delicious meal with my husband. It’s just a great way to start your day and for me, cooking is really therapeutic.

When we have any leftover tortillas we make some sort of breakfast tacos, and for us we can never have enough hot sauce!

You can use any type of hot sauce you like, maybe try experimenting with different ones if that is what you are into. But our absolute favorite to use is homemade. We originally found the recipe in one of our cookbooks but we love this adaptation linked below even more.

If you try these please let me know what you think or tag me in your photos on instagram!

Everything you need prepped and ready to go
So spicy and so good!

Ingredients

  • 4 flour tortillas (we love the Don Pancho street taco style tortillas)
  • 1/2 an avocado
  • 1 tablespoon butter
  • 3 large eggs scrambled
  • 3-4 slices of bacon cooked and diced (diced makes it easier to eat on the tacos)
  • 1/3 cup sharp cheddar cheese, grated finely
  • 1/3 cup cherry tomatoes, diced
  • fresh cilantro and hot sauce for topping
  • salt and pepper to taste

Directions

  • Cook your bacon first and set aside. Then melt your butter in a nonstick pan, add in your eggs after you have whisked them and stir with a rubber spatula on medium low until cooked. Please don’t add your salt/pepper until the end, we don’t want any dry eggs!
  • Now assemble your tacos, the toppings listed are what we enjoy but you can use what ever you like! For me, that homemade hot sauce is what makes the recipe so good.

The Cook Book: Tacolicious

The Chilis you will need: Guajillo Chiles Arbol Chiles

I couldn’t fine the exact cutting board we have but here are a few great options: Cutting Board 1 Cutting Board 2 Cutting Board 3

Protect your wooden cutting board with some block oil, we love this one: Butcher Block Oil

These GreenPan skillets are amazing and so easy to clean: Non-Stick Pans

The camera we use: Fujifilm Camera Fujifilm Camera with Lens